Take Better Pictures by Understanding Exposure
What the heck is the Big 3?
These elements are:
ISO
Aperture (f-stop)
Shutter Speed
These elements have to be in balance in order to create a perfectly exposed picture. If you make a change to one, you must make a change to one of the other or both. Let's look at each of these elements.
ISO relates to the sensitivity of the sensor in your camera. It can be made more sensitive or less sensitive by adjusting the ISO number. For example, the lower the number the lower the light sensitivity, and the higher the number the higher the light sensitivity. Also, the higher the number the greater the opportunity for noise to be introduced into the picture.
Aperture relates to the opening of the iris in the lens. It is expressed in f-stops. A funny thing happens in how we express f-stops. The higher the number the smaller the opening. And the lower the number the larger the opening. Below are examples of what the iris in the camera would look like at a few sample f-stops.
Shutter Speed relates to the amount of time it takes for the shutter in your camera to open and close. Slow shutter speed can cause a blurring of a subject that is moving. You can use faster shutter speeds to isolate the movement of a subject.


What makes a perfectly exposed picture?
A properly exposed picture is created when the Big 3 are in balance.
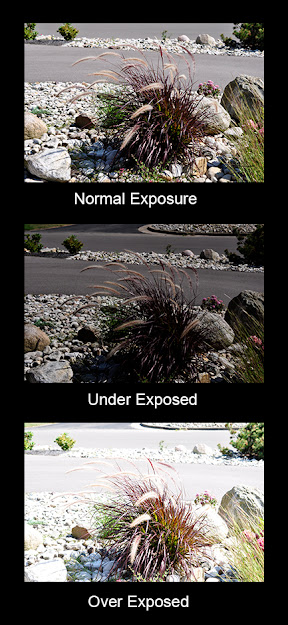
You’ve probably seen the poorly exposed pictures before:
Too dark
Too light
Just Right
No one does it on purpose. It happens. Most people set their camera to "Auto" and forget it. So what do you get? Your camera will try to come up with a balance of the Big 3. Great! Right?
Weeeeeellllll, not exactly. Your camera will come up with the balance, but is it the right balance for the picture you want to take? Your camera, full of technology as it is, will come up with an average exposure for your picture. But "average" is not what you really want.
Here's the good news!
Your Point and Shoot camera have automatic shooting modes that adjust to bringing the Big 3 in balance depending on your shooting situation. It goes beyond the simple "Auto" setting. The shooting modes on your camera adjust the exposure balance depending on the type of picture you want to make. Here are examples of the automatic shooting modes:
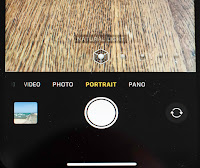
Portrait: Your camera adjusts the aperture to a lower f-stop to create an out of focus background. It also adjusts the shutter speed or ISO to compensate for the increase in light going to the sensor to keep the Big 3 in balance.
Landscape: Your camera adjusts the aperture to a higher f-stop to keep the foreground to infinity in focus. It adjusts the shutter speed or ISO to compensate for the lower amount of light coming to the sensor to keep the Big 3 in Balance
Night: Your camera adjusts the aperture to a lower f-stop and may also adjust the shutter speed to capture more light. It likely increases the ISO to make the sensor more light-sensitive.
Sports: Your camera adjusts the shutter speed to a higher speed so you can isolate the action of the sport. It adjusts the aperture and ISO to keep the Big 3 Balance.
Your Digital SLR also has automatic shooting modes as well, but as we discussed in an earlier posting, it also has other exposure controls such as Aperture Priority, Shutter Priority, Manual, and Automatic.
Your mobile phone also gives you a degree of exposure control including the ability to control the f-stop.
As we consider what it takes to make a great picture, many elements come into play. The most important of these is exposure control. You can use the rule of thirds and leading lines in a picture, but if you get the exposure wrong, they will not help.


Comments
Post a Comment
Thank you for your comment.